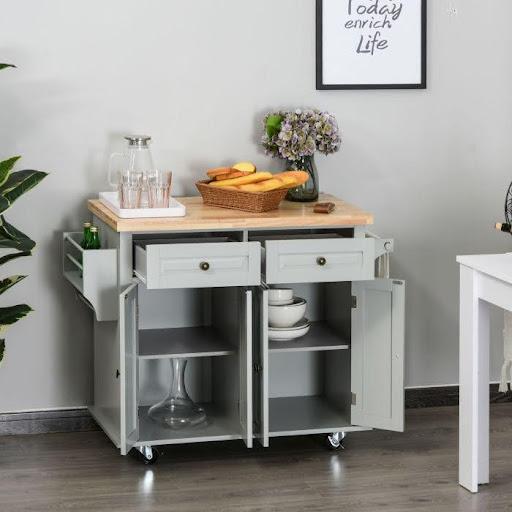
Refitting an entire kitchen can cost thousands of pounds, but you can achieve a stunning transformation by simply painting your cabinets and islands. A fresh coat of paint revitalises tired kitchen units and cupboards, giving your space a stylish update. With high-quality kitchen cupboard paint, you’ll spend just a few hundred pounds on essentials, completing the project over a free weekend. In this step-by-step guide, we’ll show you how to paint kitchen cabinets effectively, from preparation to the final touch.
Materials Required
To successfully paint your kitchen cabinets, gather the following materials:
- Wood Cabinet Paint
- Screwdriver
- Sugar Soap / Detergent Soap
- Sponge (Scotch-Brite)
- Paint Brush
- Paint Roller
- Lint Free Cloth
Process of Painting Kitchen Cupboards
1- Preparation:
Begin by removing cabinet doors, island doors, or drawers if possible as It's essential to prevent drips while painting. Place them on a rough table., so elevate the doors using planks or bricks to keep them from touching the table surface.
Next, cover the backsplash, counters, and floor with drop cloths, builder's paper, or plastic tarps to protect these areas from paint splatters and drips. It's time to clear the cabinet for painting so remove all hardware, such as knobs and handles, remember to keep screws and hinges safe. Using painter's tape, seal the hardware and label each piece for easy reassembly later.
For cabinets with non-removable doors, apply masking or painter tape to protect hinges and glass surfaces. Choosing a broader tape will ensure comprehensive coverage and help you avoid any accidental paint marks. Lay down dust sheets or old newspapers on the floor to safeguard other parts of the room from potential spills. Following these preparation steps, you’ll create a clean and protected workspace for your painting project.
2- Cleaning
Once your workspace is prepared, it’s time to focus on cleaning your cabinet surfaces. Start by using a mixture of dishwashing soap and warm water with a sponge to remove any grease and grime. This step is crucial, as it ensures a smooth and clean canvas for your paint.
After scrubbing the surfaces, rinse the sponge and wipe down the area with a damp cloth to remove any soap residue. Follow this by drying the surfaces with a lint-free cloth, ensuring no moisture or residue remains. Cleaning is essential to help the paint adhere better and give a more professional finish.

3: Sanding
Next, it’s time to sand the surfaces to enhance paint adhesion. Use 100-150 grit sandpaper to lightly sand the cabinet surfaces, being mindful to sand in the direction of the grain. If your cabinets are melamine or high gloss, you can skip this step, as these finishes typically do not require sanding.
For any imperfections, fill them with a high-quality, ready-mixed filler that dries white and doesn’t shrink or crack. After the filler has dried, sand the area again for a smooth finish. To achieve a clean look on corners, use round sanding paper, ensuring you don’t apply too much pressure—normal sanding is sufficient.
Once you’ve finished sanding, wipe down the surfaces with a lint-free damp cloth. This is essential, as any small particles left behind can disrupt the paint application and ruin the final finish. Taking the time to sand properly will ensure your painted cabinets have a flawless look.
4: Priming
After sanding, the next crucial step is priming. Choose a wood or melamine primer based on your cabinet material. If you’re working with wood, opt for a wood primer and undercoat in a colour tone that complements your topcoat. This will help patch-prime any knotty or resinous areas, concealing stains and grain patterns while improving adhesion for the finish coat.
For the best results, consider using a shellac-based primer. Unlike water-based primers, shellac primers don’t raise the grain of the wood, providing a smoother surface for painting. They also offer excellent coverage and can effectively block stains, making them an ideal choice for kitchen cabinets. Applying a quality primer not only enhances the durability of your paint but also ensures a beautiful, long-lasting finish.

5: Undercoat
Once your primer has dried, apply a full coat of undercoat. This step is essential for achieving a professional finish and enhancing the durability of your paint job. The undercoat acts as a base layer that improves the coverage and adhesion of the topcoat while helping to hide any imperfections.
Undercoat selection depends on the type of wood you’re working with. For softwoods, such as pine, a standard acrylic undercoat will work well, providing a smooth surface for the topcoat. For hardwoods, like oak or mahogany, a high-quality oil-based undercoat is recommended. These undercoats offer better adhesion and can effectively block stains or knots in the wood.
Applying a full coat of high quality undercoat ensures even colour and helps prevent any bleed-through from the wood grain, resulting in a flawless final appearance.
6: Painting
Now it’s time to bring your cabinets to life with paint. Pick a paint colour matching to your kitchen furniture and start painting by using a paintbrush to carefully apply paint to the cracks, dips, and corners of the cabinet doors. This detailed work ensures you cover all areas thoroughly. Once you’ve tackled the intricate spots, switch to a microfiber paint roller for the larger, flat surfaces, allowing for an even application across the entire cabinet.
After the first coat is applied, allow it to dry completely. Once dry, lightly sand the surface with fine sandpaper to ensure a smooth, professional finish. Don’t forget to wipe away any dust with a damp cloth before applying the second coat. For optimal results, plan for two coats of your chosen colour, allowing at least 12 hours between each coat for proper curing.
Quicker Alternative:
You can use a roller for flat surfaces and a brush for creases and crevices. However, if you’re looking for the most efficient method, consider using a paint sprayer. It provides a uniform spray, saving you both effort and time. Plus, a paint sprayer is a versatile tool that can be used for other home projects, making it a worthwhile investment.
7: Placement
Once the paint has fully dried, it’s time to reassemble your cabinets. Start by carefully placing the knobs, handles, and any other accessories back onto the doors. As you do this, refer to the labels you placed on the tape earlier; they will help you easily recall which door belongs to which cabinet, as well as the number of screws and hardware for each door.
Next, reattach the doors to their respective frames, ensuring everything is aligned properly. This is where those labels really come in handy, making the process more straightforward and efficient.
Before you finish, take a moment to do a final clean-up. Wipe down the surfaces to remove any dust or fingerprints that may have accumulated during the painting process. Now, step back and enjoy the fresh look of your kitchen! Your hard work has paid off, and now you can enjoy your revitalised kitchen. You can use the same process to paint China cabinets, wine consoles and kitchen console tables made of wood to match interior of your kitchen or dining room.
Best Paint for Wood Cabinets: Oil or Water?

When deciding between oil-based and water-based paints for wood cabinets, there are several factors to consider. Oil-based paints provide a high-quality finish that is often smoother and more durable. However, they have a high volatile organic compounds (VOC) content, which refers to harmful chemicals that can evaporate into the air, leading to poor indoor air quality. This can cause irritation to the eyes, nose, and throat, and the strong fumes can be overwhelming. Additionally, oil-based paints take longer to dry—typically around 6 to 8 hours—extending the overall painting process.
In contrast, water-based paints dry much faster, usually within 1 to 2 hours. They also contain lower VOC levels, making them a more environmentally friendly choice. Water-based paints are easier to clean up as well, requiring only soap and water, whereas oil-based paints necessitate the use of solvents like paint thinner.
A hybrid option combines the benefits of both oil and water-based paints, offering a high finish with faster drying times and reduced VOC levels. One excellent choice in this category is Benjamin Moore Advanced, known for its durability and ease of use.
It's worth noting that older cabinets are often painted with oil paint, as it was the standard choice in the past due to its smooth finish and durability. However, with modern advancements in paint technology, water-based and hybrid paints are now excellent alternatives that provide both quality and ease of use.
For the best results, consider using enamel paints specially formulated for cabinets. While they may be a bit more expensive than standard wall paints, their longevity and finish quality make them a worthwhile investment. Compromising on paint quality can lead to regrets down the line, so it's advisable to invest in high-quality products that will last for years.
What Extra Steps Needed to Repaint An Old Kitchen Cupboard?
To repaint an old, previously painted kitchen cupboard, the procedure of painting is the same, you just need to start by stripping any peeling or blistered paint to create a clean surface. Next, sand the entire cupboard to smooth out rough areas and enhance adhesion for the new paint, blending the edges of any old paint patches to avoid visible lines in the final finish. When your cabinet piece is clean, you can start from step one of our painting guide.